
Difficulty: Beginner | Time: 30 to 90 minutes, plus drying | Cost: About $10 to $30
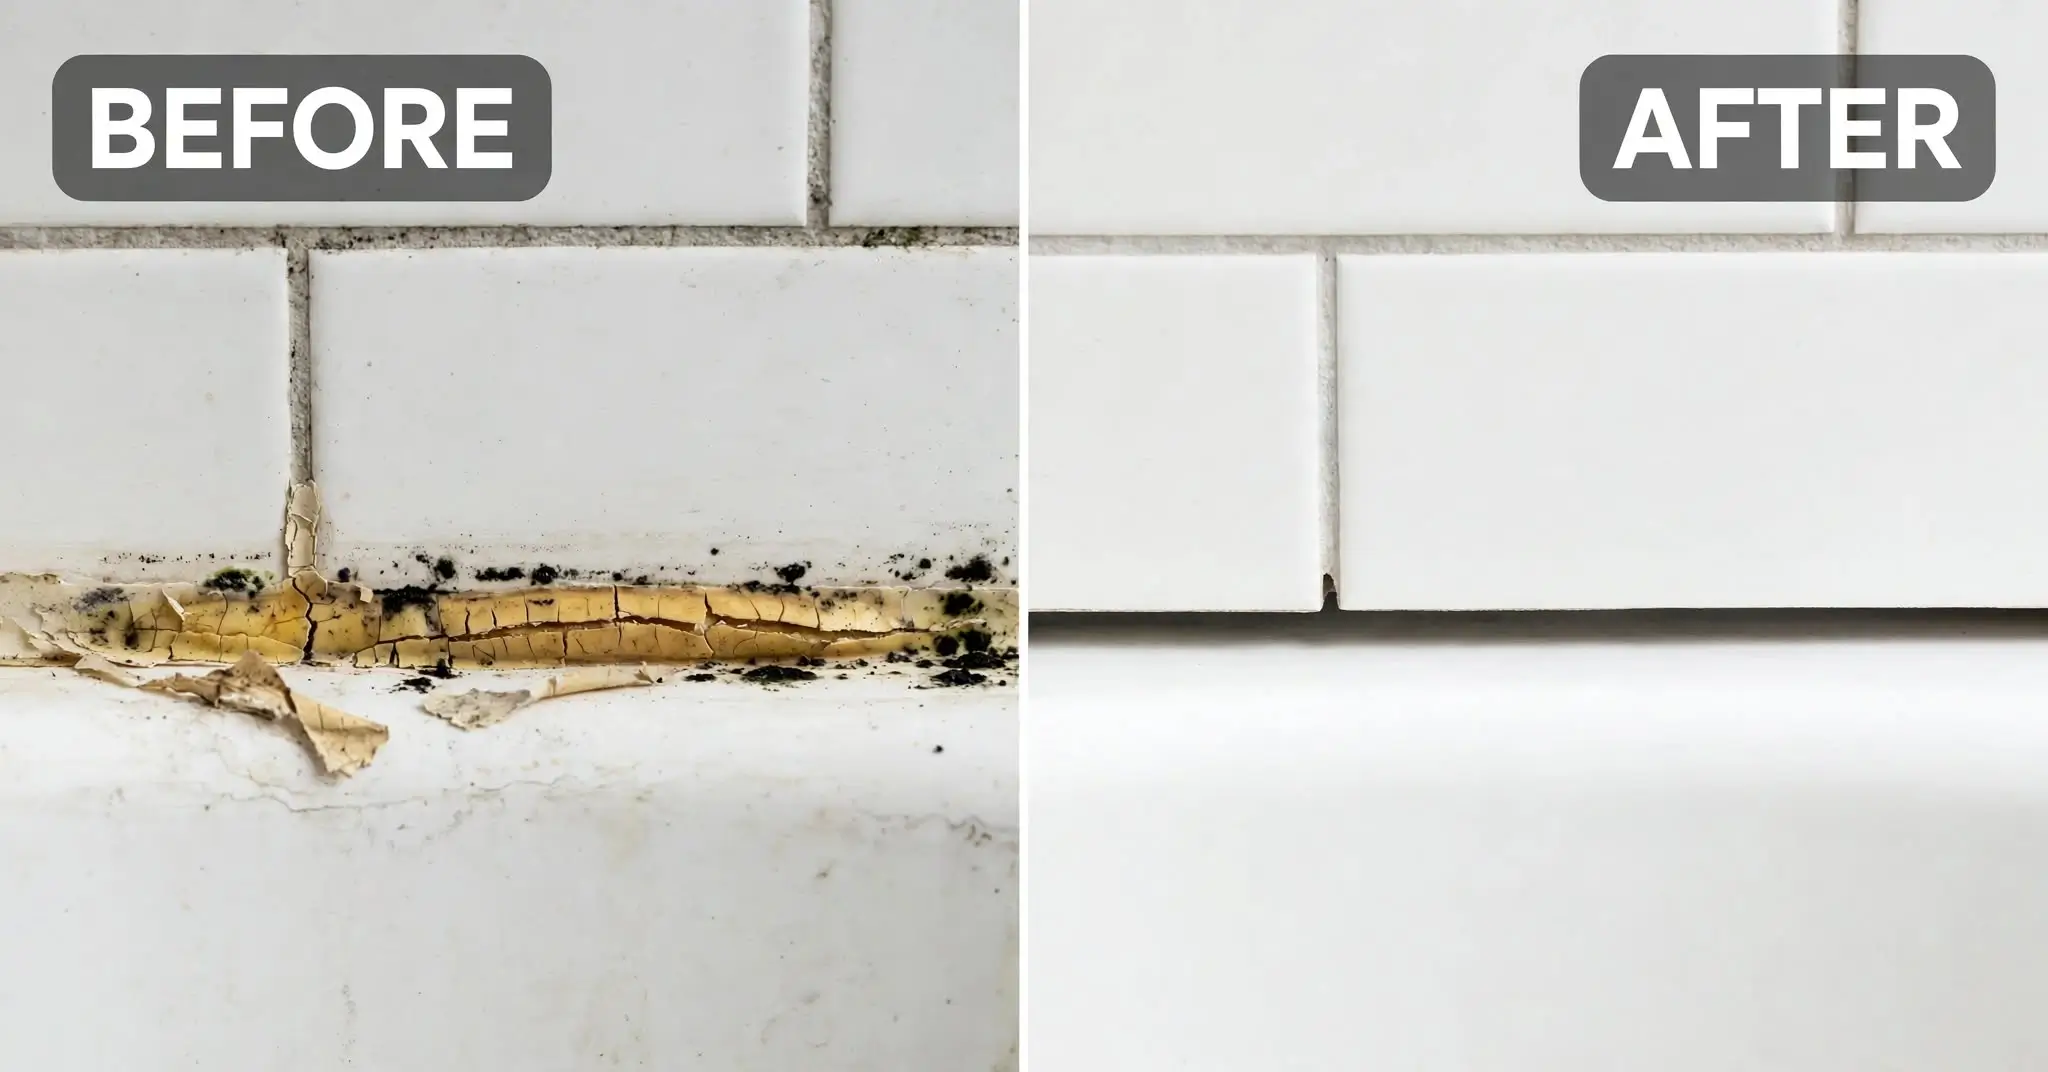
Knowing how to remove old caulk the right way saves you money and a failed seal. The job comes down to a few simple moves. You identify your caulk type, soften it, cut it loose, and pull it out. Then you clean off every trace of residue, treat any mold, and let the joint dry. This guide walks you through each step in order. You will learn which remover fits your caulk. You’ll also see which tools are safe on your tub, tile, or counter. We cover stubborn spots, safety in older homes, and when a pro makes more sense. By the end, your joint will be clean, dry, and ready for recaulking.
To remove old caulk, soften it with a caulk remover or gentle heat. Score both edges with a utility knife or plastic blade. Pull the bead out with a caulk removal tool. Wipe away the residue with rubbing alcohol. Treat any mold, then let the joint dry for up to 24 hours before recaulking.
The 7 steps at a glance
- Protect the surface and open a window.
- Soften the caulk with remover or heat.
- Score both edges of the bead.
- Pull and scrape out the old caulk.
- Clean off the residue.
- Treat any mold in the joint.
- Let the joint dry and check it.
What You Need Before You Start
You don’t need a big toolbox to remove old caulk. Most of these items cost a few dollars at any hardware store.
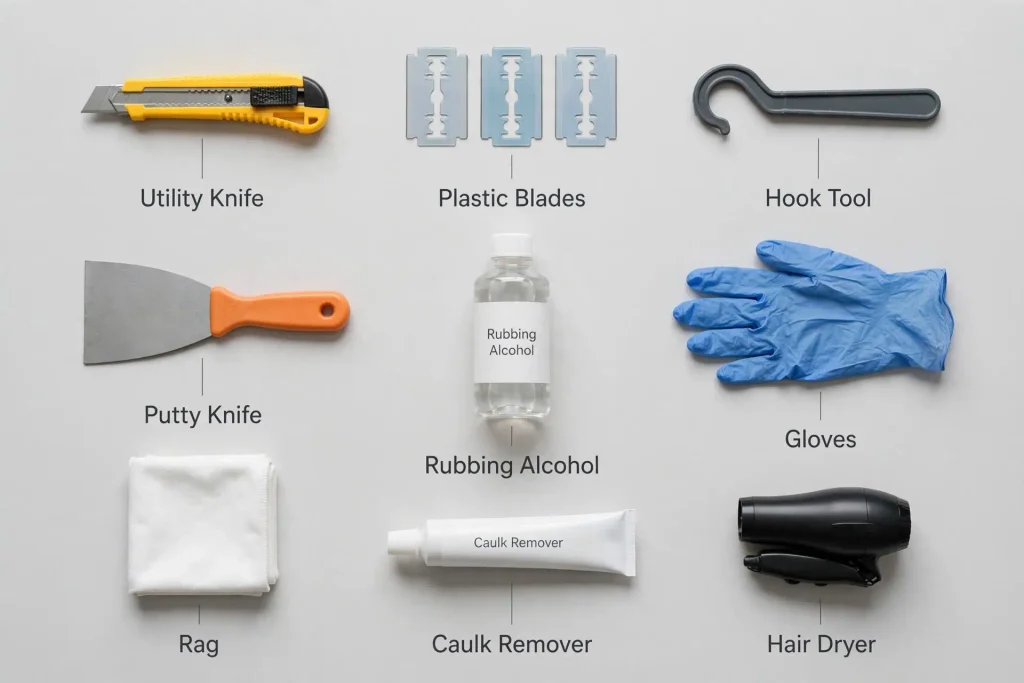
Basic tools
- Utility knife: Cuts the caulk’s grip along each edge.
- Plastic razor blades: Scrape without scratching acrylic, fiberglass, or glossy tile.
- Caulk removal tool: A hooked tip pulls the bead out in long strips.
- Plastic putty knife: Lifts wide or flat beads.
- Rubbing alcohol (isopropyl): Removes the thin film left behind.
- Rags or paper towels: For wiping as you go.
- Gloves: Protect your hands from blades and solvents.
Helpful extras
- Caulk remover gel: Softens hard or thick caulk.
- Hair dryer: Warms stubborn silicone so it peels easier.
- Painter’s tape: Protects painted walls near the joint.
- Mild detergent and a soft brush: For mold cleanup.
- Mineral spirits: Clears silicone film on porcelain or tile. Keep it off acrylic.
Silicone or Latex? Identify Your Caulk First
Your caulk type decides which remover and cleaner will work. Check it before you buy a remover or start to remove old caulk.
The Quick Caulk Test
Press your fingernail into the bead. Silicone feels rubbery and springs back. It also stretches when you pull a loose end. Latex or acrylic caulk feels firmer. Old latex often cracks or crumbles instead of stretching. If the caulk has paint on it, it’s almost always latex. Paint doesn’t stick to pure silicone.
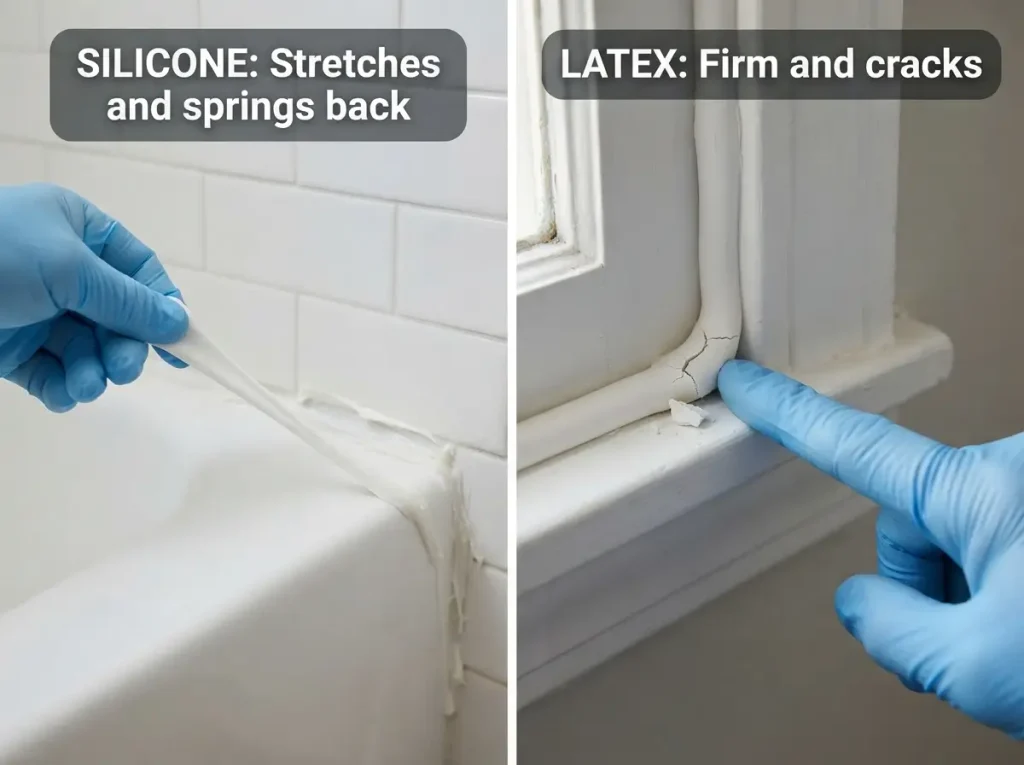
Not sure if it’s caulk or grout? Caulk is flexible and runs where two surfaces meet, like the tub and the wall. Grout is hard and fills the lines between tiles. This guide covers caulk only.
Why the Type Changes Your Method
| Trait | Silicone | Latex or Acrylic |
| Feel | Rubbery and stretchy | Firm, may crumble |
| Common spots | Tubs, showers, sinks | Trim, windows, painted joints |
| Softens with | Silicone remover, heat | Latex remover, warm water |
| Leftover residue | Slick, oily film | Chalky or flaky bits |
| Residue cleaner | Alcohol or silicone remover | Alcohol, soap and water |
Silicone is the tougher one to remove. It leaves a thin, slick film that new caulk won’t grip. Latex removers like DAP’s Caulk-Be-Gone won’t soften it at all.
How to Remove Old Caulk Step by Step
Follow these steps in order to remove old caulk cleanly. Each one sets up the next. Skip one, and you’ll likely redo the job.
Step 1: Protect the Surface and Open a Window
Clear the tub ledge or counter. Lay an old towel in the tub to catch debris and protect the finish. Open a window or run the bathroom fan, since removers and alcohol give off fumes. Put on your gloves. If your home was built between 1950 and 1979, read the safety note on older homes before you scrape.
Avoid this: Working in a closed room with solvents.
[IMAGE: Bathtub with a towel inside and the fan running | Alt text: prepping a bathtub before caulk removal]
Step 2: Soften the Caulk With Remover or Heat
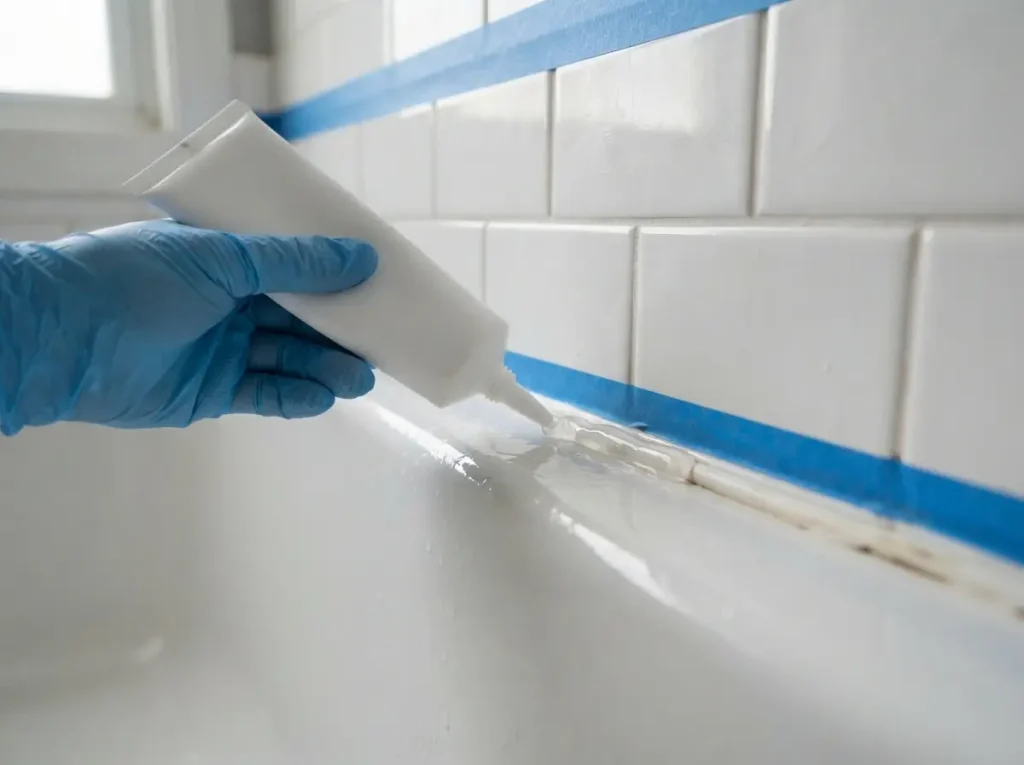
Softening first is the fastest way to clean removal. Apply a caulk remover gel along the full bead. Dwell times vary a lot by product. Some DAP removers work in 5 to 20 minutes. Caulk-Be-Gone needs at least 2 hours. Always follow your label, and see the remover comparison below to pick the right product. For silicone without a remover, warm a short section with a hair dryer on low. Keep the dryer moving.
Avoid this: Using a heat gun on acrylic or fiberglass. High heat can warp plastic surfaces.
Step 3: Score Both Edges of the Bead
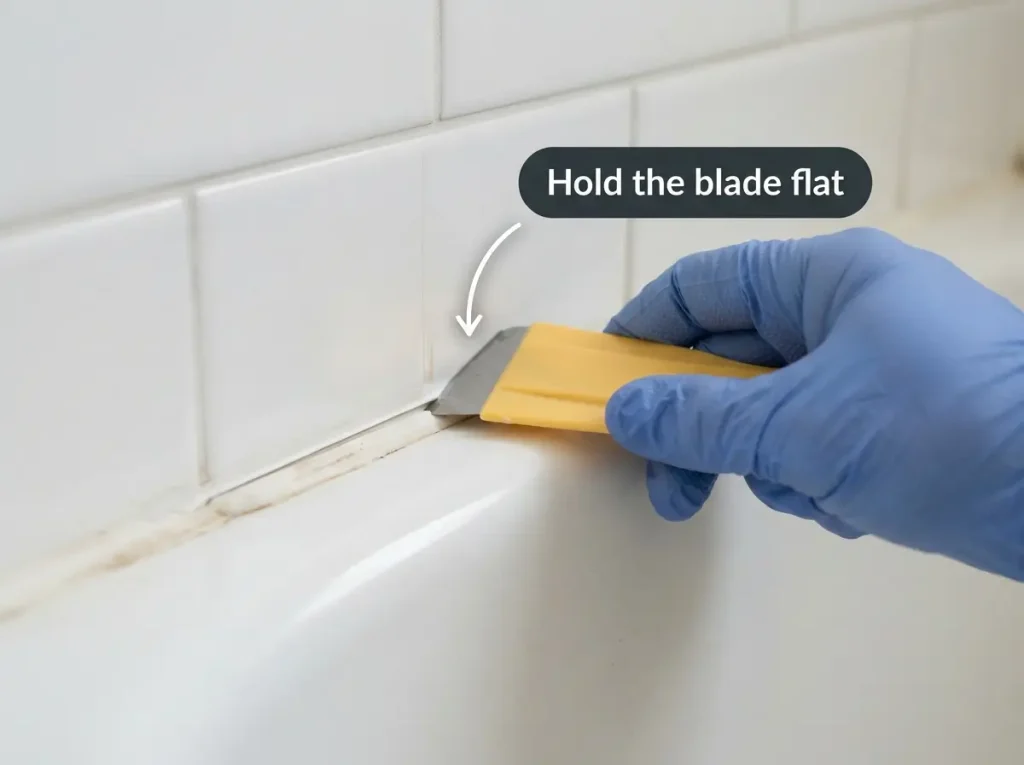
Run a utility knife or plastic blade along the top edge of the caulk. Then do the bottom edge. Hold the blade almost flat against the surface. This cuts the bond without digging in. On acrylic and fiberglass, use a plastic blade only.
Avoid this: Angling a metal blade into the tub. One slip leaves a permanent scratch.
Step 4: Pull and Scrape Out the Old Caulk
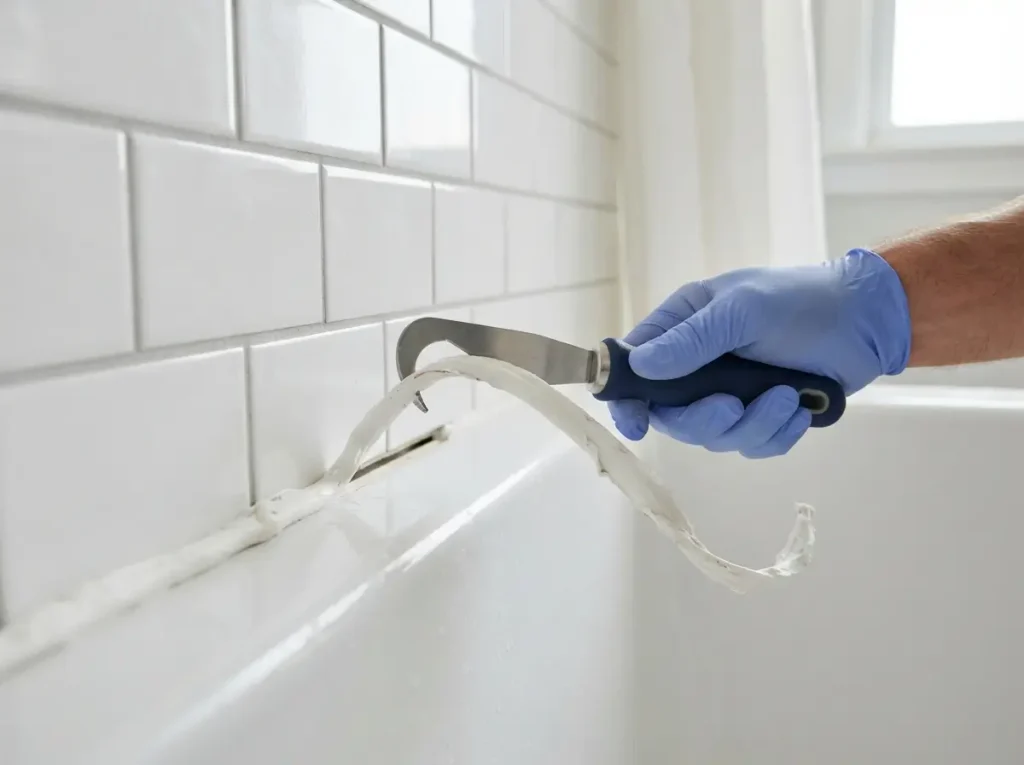
Hook your caulk removal tool under one end of the bead. Pull slowly along the joint. Soft silicone often comes out in long strips. Latex tends to break into chunks, so scrape it out with the putty knife. Work in sections about a foot long for better control.
Avoid this: Yanking hard. Fast pulls snap the bead and leave more bits behind.
Step 5: Clean Off the Residue So New Caulk Can Bond
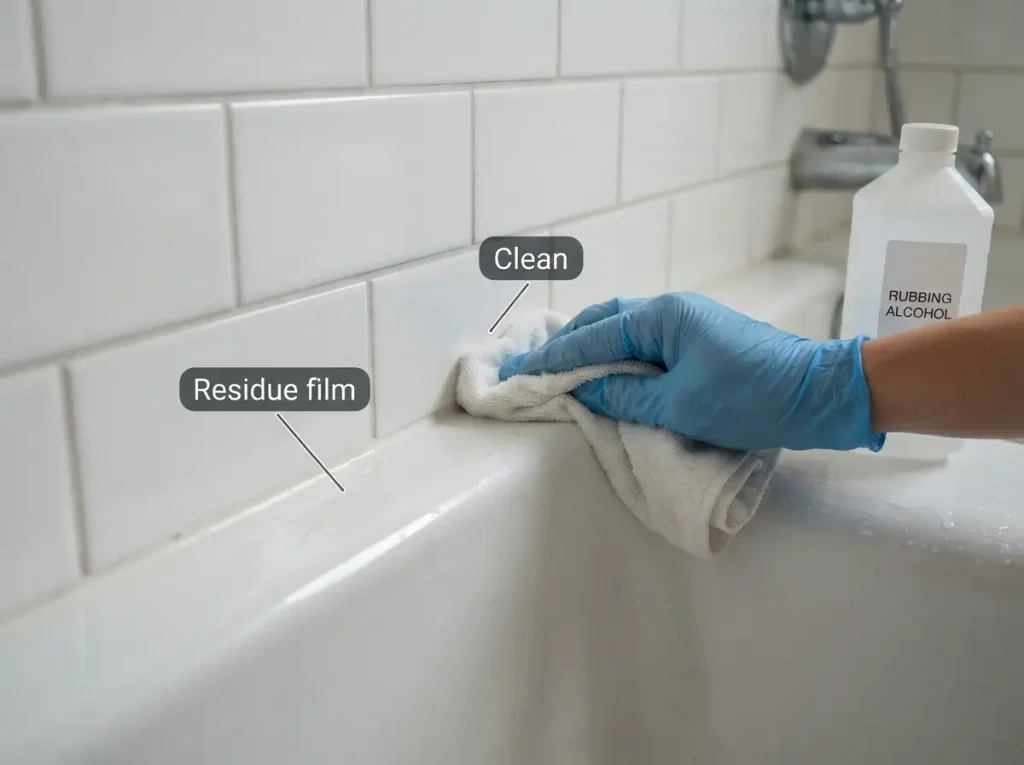
This step makes or breaks your next seal. New caulk won’t stick to leftover film. Dampen a rag with rubbing alcohol and wipe the whole joint. DAP and GE both recommend alcohol for this final cleanup. For stubborn silicone film on tile or porcelain, a silicone remover or mineral spirits helps. On acrylic tubs, use alcohol only. Delta recommends denatured alcohol for sealant cleanup on acrylic. It warns against mineral spirits, acetone, and similar solvents.
Avoid this: Calling it clean because it looks clean. Silicone film is nearly invisible.
Step 6: Treat Any Mold Left in the Joint
Black spots in the gap mean mold got under the old bead. Scrub them with detergent and water, then dry the area fully. That’s the EPA’s basic advice for mold on hard surfaces. The EPA also says bleach isn’t recommended as a routine part of mold cleanup. If you do use bleach, never mix it with cleaners that contain ammonia.
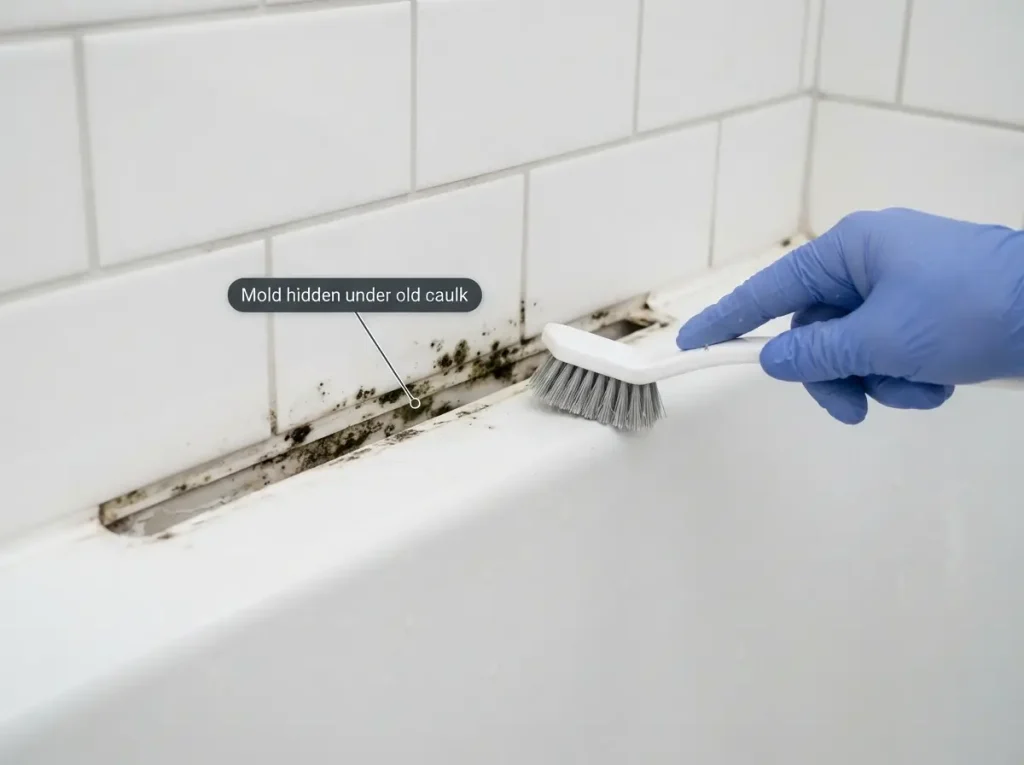
Stop and call a pro if you find soft drywall, loose tiles, or a musty smell that won’t clear. These point to water behind the wall. The EPA says homeowners can usually handle mold under about 10 square feet.
Avoid this: Caulking over mold stains. Moisture trapped under new caulk feeds regrowth.
Step 7: Let the Joint Dry and Check It
Water hides in the gap even when the surface looks dry. Give a bathroom joint up to 24 hours. A fan speeds this up. Then drag a clean fingertip along the joint. It should feel dry and slightly grippy. A slick spot means silicone film remains, so wipe it again with alcohol.
Avoid this: Recaulking the same day in a humid bathroom. The new bead may never bond well.
Which Caulk Remover Works Best?
The best way to remove caulk depends on two things. What kind of caulk is it, and what is it stuck to? Learning how to remove old caulk safely starts with matching the product to both. Here’s how the common options compare.
| Option | Silicone | Latex | Safe on | Avoid on |
| Silicone caulk remover | Yes | Some brands | Tile, porcelain, glass, metal | Check the label for plastics |
| Latex remover (Caulk-Be-Gone) | No | Yes | Tile, ceramic | Refinished porcelain, ABS, vinyl, some fiberglass |
| Rubbing alcohol | Residue only | Residue only | Most surfaces | Test first on plastics |
| Mineral spirits | Residue | Somewhat | Tile, porcelain, glass | Acrylic, fiberglass, paint |
| Acetone | Residue | Somewhat | Glass, metal, glazed tile | Acrylic, fiberglass, paint, unsealed stone |
| Hair dryer (low) | Softens | A little | Most surfaces | Keep it moving on plastic |
| WD-40 | Loosens | Loosens | Tile, metal | Leaves oil you must clean off |
| White vinegar | Barely | Barely | Tile, grout | Marble and other natural stone |
The Caulk-Be-Gone limits come from DAP’s own data sheet. Silicone removers from DAP’s Krud Kutter line, Goo Gone, and Klean-Strip are easy to find at US hardware stores. Whatever you buy, test it on a hidden spot first. Then remove old caulk in one small section before doing the whole tub.
How to Remove Old Caulk From Different Surfaces
Every surface needs a slightly different touch. Find yours below.
How to Remove Caulk From a Shower
Shower stalls have long vertical seams and tight corners. Work from top to bottom so debris falls away from clean areas. Use the hook tool for inside corners. Pay close attention where wall panels meet the shower pan. Leaks often start there. If you have a glass door, clean the metal track with alcohol instead of a metal blade.
Acrylic and Fiberglass Tubs
These surfaces scratch easily. When you remove old caulk here, use plastic blades and plastic tools only. Clean residue with alcohol, not solvents or abrasive pads. Bath Fitter warns that acetone and harsh chemicals can break down acrylic and dull its finish.
Porcelain and Cast Iron Tubs
These glazed finishes handle more. A sharp metal blade held flat works well here. Mineral spirits are fine for silicone film. Refinished tubs are the exception. Treat a refinished tub like acrylic, because its coating chips easily.
Ceramic Tile
Glazed tile tolerates a metal blade if you keep it flat. Take care along grout lines, since grout can crumble under pressure. Scrape gently where the tile meets the tub.
Natural Stone Countertops
Marble, granite, and travertine can react to acids and harsh solvents. Skip vinegar and acetone. Use plastic tools, then clean with alcohol or a stone safe cleaner. Test any product in a hidden corner first.
Kitchen and Bathroom Sinks
Undermount sinks hide caulk under the counter lip. Use a flashlight and a hook tool to reach it. For drop in sinks, cut the bead around the rim and then peel. If you find plumber’s putty, scrape it out separately.
Windows, Doors, and Exterior Trim
Outdoor caulk is often latex or polyurethane, and sun makes it hard. A remover gel or a warm afternoon makes the job easier. Use a stiff putty knife on wood trim, but go slow to avoid gouging it. If your home is older, read the safety note below first. A clean frame is what makes the difference when you caulk windows properly.
Troubleshooting Caulk That Won’t Come Out
Sometimes removing old caulk takes more than one pass. Here’s how to handle the usual problems.
How to Remove Old Caulk That Won’t Budge
Rock hard caulk usually needs more soak time, not more force. Reapply remover and give it longer. Score the edges again if needed. You might feel tempted to caulk over the leftovers. Don’t. New caulk on a failing layer peels right off with it.
Several Layers of Old Caulk
Many older tubs have two or three beads stacked on top of each other. Take them off one layer at a time. Score, soften, and pull the top layer before you start the next.
Painted Over Caulk
Paint seals the caulk and blocks the remover. Score through the paint first so the gel can reach the caulk. Expect a longer soak. DAP notes that painted caulk may take longer or need extra applications.
Safety Tips Before You Start Scraping
Removing old caulk is a low risk job for most people. A few habits keep it that way. Wear gloves when you handle blades and solvents. Keep a window open or the fan running. Acetone and mineral spirits are flammable, so keep them away from candles and pilot lights. Cover or retract your blade whenever you set it down.
Older Homes: Check for PCBs and Asbestos
Was your home built or remodeled between about 1950 and 1979? If so, pause before you scrape. The EPA reports that caulk from that era may contain as much as 40 percent PCBs. EPA testing has mostly found it in large apartment complexes and older buildings. It hasn’t turned up in single family homes. Some caulk from that period also contained asbestos. If old window or door caulk is brittle, have it tested before you scrape, sand, or heat it.
DIY Caulking Repair vs. Hiring a Pro
Most people remove old caulk themselves in a single afternoon. DIY supplies run about $10 to $30. A pro recaulking job usually costs $100 to $500, depending on size and complexity. Call a pro if you find rotted wood, water damage behind the wall, or widespread mold. Hiring out also makes sense for expensive stone you don’t want to risk.
Frequently Asked Questions
Can You Caulk Over Old Caulk?
Usually, no. New caulk bonds poorly to old caulk, so both fail together. One exception is refreshing clean, intact silicone with a product made for that job, such as GE’s Re-New line. Otherwise, take the old bead out first, then pick the replacement based on whether latex or silicone suits that joint.
How Long Does Caulk Removal Take?
Plan on 30 to 90 minutes of hands on work for a standard tub. A latex remover gel adds 2 to 6 hours of soak time. Drying can take up to another 24 hours.
What Dissolves Silicone Caulk?
Household products won’t dissolve cured silicone. Commercial silicone removers soften or break it down so you can scrape it out. Rubbing alcohol then clears the thin film left behind. A hair dryer on low also helps loosen it.
Does Vinegar Remove Caulk?
Not really. Vinegar may soften some caulk a little, but it won’t dissolve silicone or hard latex. It works better for cleaning mold after the caulk is out. Keep it off natural stone.
Does WD-40 Remove Caulk?
It can help loosen caulk. Some pros spray it on and wait 10 to 20 minutes before scraping. It leaves an oily film, so clean the joint well with alcohol afterward.
Can You Clean Black Mold Off Caulk Instead of Removing It?
Sometimes. Surface mold often wipes off with detergent. But once black mold grows into the silicone itself, cleaning rarely clears the stain. At that point, it’s time to remove old caulk and lay a fresh bead.
Can You Sand Caulk After It Dries?
Sanding won’t remove caulk. Silicone gums up sandpaper instead of sanding smooth. Fully cured latex caulk can take a light sanding before paint. In homes from 1950 to 1979, never sand old caulk before testing it.
How Long Should You Wait to Recaulk After Removing Old Caulk?
Wait until the joint is completely dry. In a bathroom, that can take up to 24 hours. Alcohol evaporates within minutes, but water in the gap takes much longer. Once you apply new caulk, drying time depends on the product and the room’s humidity.
When Should Bathroom Caulk Be Replaced?
There’s no fixed schedule. Replace caulk when it cracks, shrinks, peels away, or holds mold that won’t clean off. A gap you can slide a fingernail into is another clear sign. Check your tub and shower caulk twice a year.
Final Thoughts
Now you know how to remove old caulk without harming your tub, tile, or counters. Match your remover to your caulk type. Use plastic blades on soft surfaces. Take the residue step seriously, because it decides how long your new bead lasts. Treat any mold, let the joint dry, and you’re ready to caulk your bathtub again.

About HomeFixStyle
HomeFixStyle is a home improvement blog dedicated to helping readers create better, more comfortable, and stylish homes. We share practical ideas, helpful guides, home decor inspiration, renovation tips, and simple solutions for everyday home projects. Our goal is to make home improvement easier to understand and apply, whether you are updating one room or improving your entire home.