
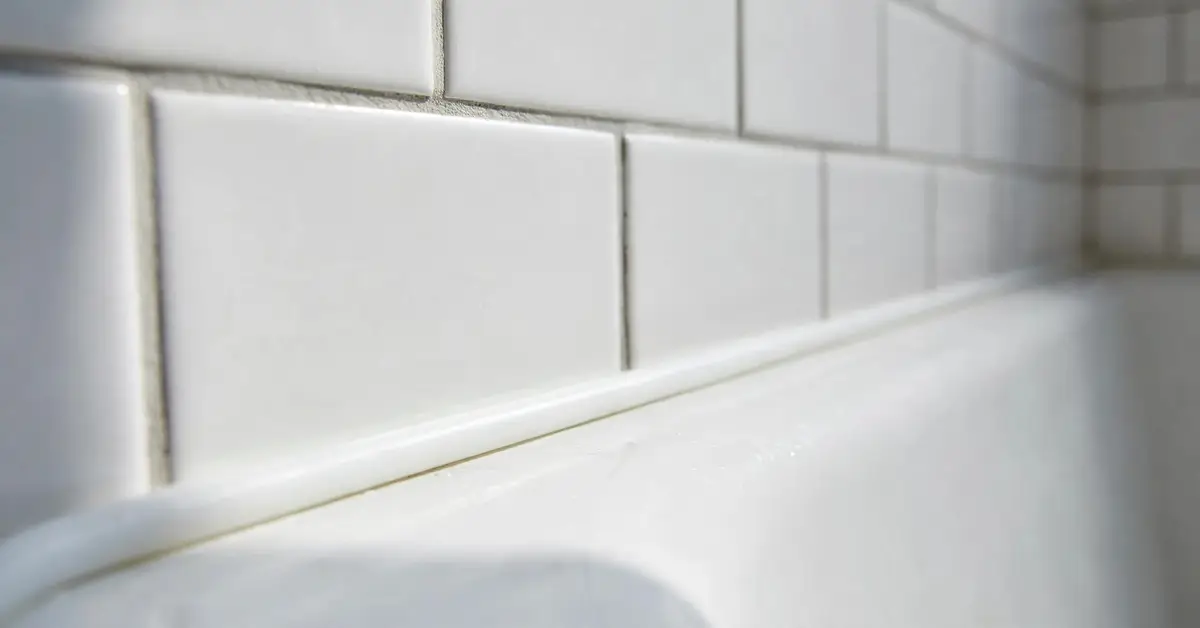
Fresh caulk keeps water out of your walls and makes an old tub look clean again. Here is how to caulk a bathtub for beginners, in plain terms. Remove every bit of old caulk and scrub the joint with detergent and water. Let it dry completely. Fill the tub with water, tape both sides of the joint, and run one steady bead of 100% silicone. Smooth it and pull the tape while the caulk is wet. Let it cure about 24 hours before you drain the tub.
Pick your tools based on your tub material, since acrylic and fiberglass scratch easily. Caulk that fails within months usually failed during prep. A bad bead is easy to cut out and redo. Call a pro if the wall feels soft or water stains keep appearing below. These steps cover the joints where the tub meets the wall and floor.
| Project Detail | What to Expect |
| Skill level | Beginner friendly |
| Active work time | 1 to 3 hours, mostly removal |
| Total time | 1 to 2 days, including drying and curing |
| DIY supply cost | Usually under $50 |
| Pro cost | About $50 to $300 |
When to Replace Bathtub Caulk
Bathtub caulk fails because the joint moves and stays wet. Every bath flexes the tub slightly, and every shower soaks the seam. Over time, the caulk hardens, shrinks, pulls away, and lets water behind the tile.
That water is the real problem. It can rot wall framing and feed mold you cannot see. A new tube of caulk costs far less than either repair.
Signs Your Tub Needs New Caulk
Check the joint closely in good light. Replace the caulk if you notice any of these signs:
- The caulk lifts, peels, or leaves gaps along the tub or tile.
- It feels hard, cracks when pressed, or crumbles in spots.
- Black or pink spots sit on the surface or under clear caulk.
- Yellow or gray stains stay put after a good scrub.
- A musty smell lingers near the tub after cleaning.
- Water stains appear on the ceiling or wall below the bathroom.
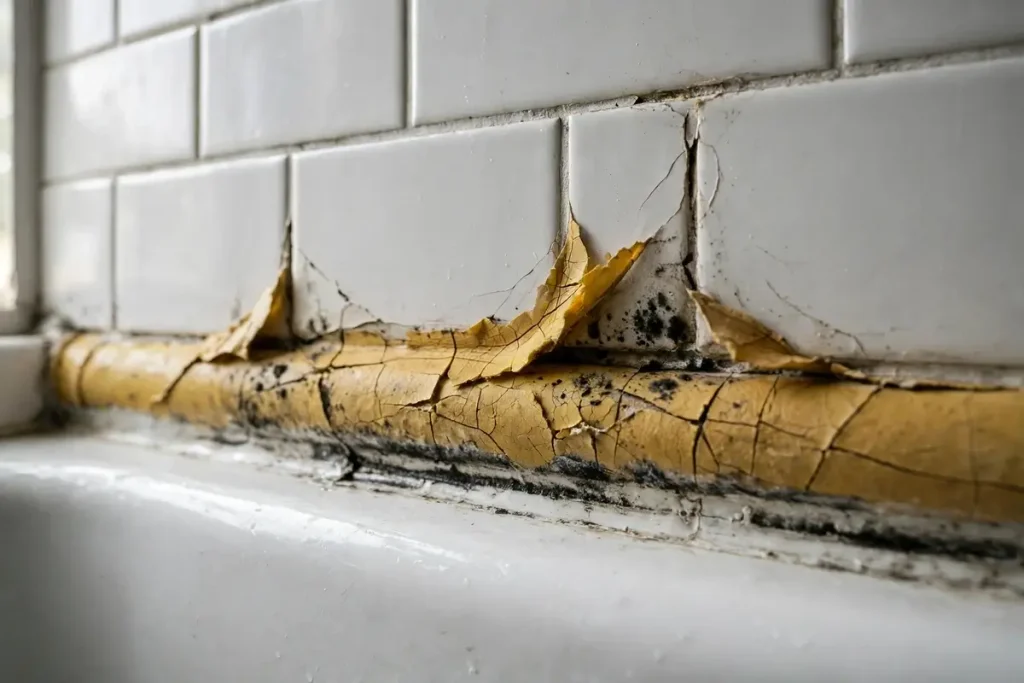
The last two signs can mean water has already reached the wall or floor. Fresh caulk may not solve that, so get the leak checked before recaulking a bathtub.
How Often to Recaulk a Bathtub
Plan to replace tub caulk about every five years. American Home Shield lists caulk older than five years as a sign it needs replacing. Replace it sooner if you spot any of the warning signs above.
Choosing the Right Caulk for Your Bathtub
For caulking a bathtub, use 100% silicone labeled for tub and tile or kitchen and bath. Silicone stays flexible and sheds water, even as the tub moves every day. Plain acrylic latex does not hold up in this spot.
Windows face a different kind of movement, driven by heat and cold instead of bathwater, which is why caulking windows usually calls for an exterior-grade silicone or polyurethane instead.
Silicone vs Siliconized Acrylic vs Acrylic Latex
| Caulk Type | Water Resistance | Flexibility | Cleanup | Paintable | Best Use |
| 100% silicone | Excellent | High | Harder, wipe before it cures | No | Tub to wall and tub to floor joints |
| Siliconized acrylic | Good | Moderate | Soap and water | Yes | Low movement joints, painted trim |
| Acrylic latex | Fair | Low | Soap and water | Yes | Dry areas away from the tub |
Look for mold and mildew resistance on the label. That additive protects the surface of the caulk. It cannot stop mold growing behind the bead if the joint was dirty or damp.
If your surround is marble or other natural stone, buy a neutral cure silicone. Standard bathroom silicone can discolor stone.
Picking a Caulk Color
Match the caulk color to the tub. White caulk on a white tub looks clean and finished. Clear silicone suits colored tile, but it shows dirt and mold underneath. One standard tube is enough to caulk a bathtub of normal size. Buy a second tube if your gaps are wide.
Tools and Materials You Need
To caulk a tub, you need a caulk gun, a blade for the old bead, and basic cleaning supplies. Any hardware store sells all of it for less than one pro visit.
- A caulk gun with a drip free trigger, which stops the flow when you let go
- A tube of 100% silicone tub and tile caulk
- A utility knife, or plastic razor blades for acrylic and fiberglass tubs
- A caulk removal tool with a hooked tip for pulling out old caulk
- Painter’s tape for straight, clean edges
- A caulk finishing tool or nitrile gloves for shaping the bead
- Dish soap, a scrub brush, and a nonscratch scrub pad
- Rubbing alcohol and clean rags for the final wipe
- A shop vacuum for debris and a small fan for drying
Know Your Tub Material Before You Start
Check your tub material before you pick up a blade. Acrylic and fiberglass scratch and flex easily. Cast iron and enameled steel resist scratches, but their glossy finish can still chip. Your tub type decides the safest way to caulk a tub.
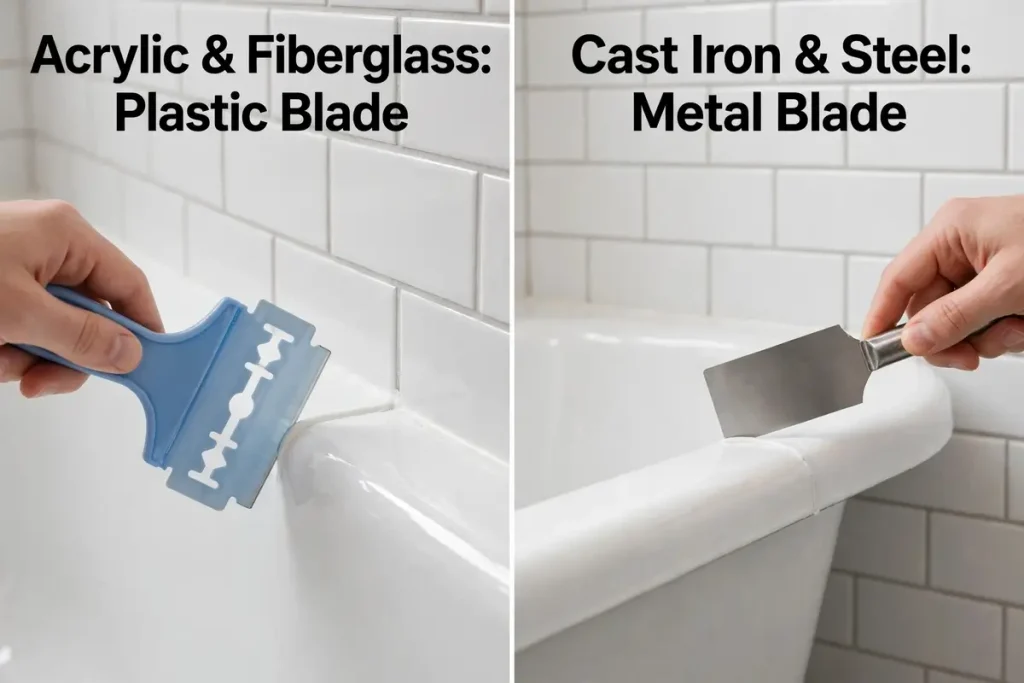
Acrylic and Fiberglass Tubs
These tubs feel warm and sound a little hollow when you tap them. Use only plastic razor blades and plastic caulk tools on them. This Old House warns that chemical caulk removers can harm plastic surfaces too. These tubs flex the most when full, so the water step later matters most here.
Cast Iron and Enameled Steel Tubs
These tubs feel cold and sound solid when you tap them. A magnet sticks to both, which makes them easy to identify. A metal blade is fine on these tubs. Keep it almost flat, so the edge cannot dig into the enamel.
How to Remove Old Caulk Before You Recaulk a Bathtub
Remove all of the old caulk, down to bare tub and tile, the same process covered in detail in how to remove old caulk from any surface. New caulk will not bond to old caulk or its residue. This step is the slowest part of the job, and it decides how long the new seal lasts.
Score Both Edges of the Old Caulk
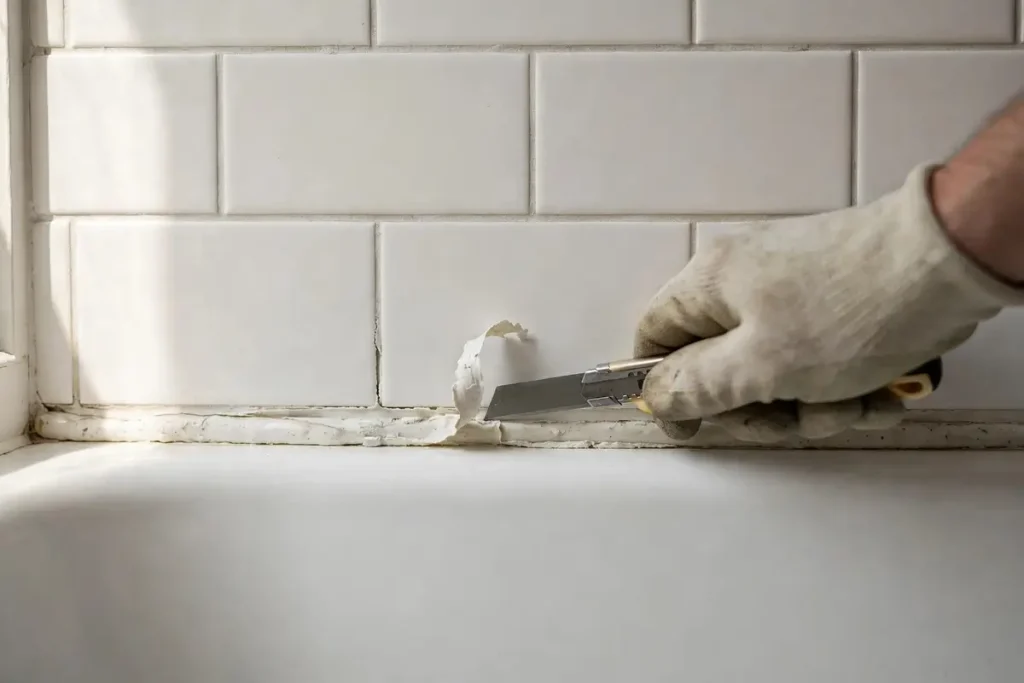
Run your blade along the top edge, where the caulk meets the tile. Then run it along the bottom edge, where the caulk meets the tub. Keep the blade low and pull it toward you in smooth strokes. Scoring breaks the bond, so the bead lifts out in long strips.
Scrape Out Every Strip
Hook the caulk removal tool under the loose bead and pull. Work around the tub in short sections. Dig into the corners, where old caulk sits deepest. Vacuum the loose bits as you go, so none end up under the new bead.
Soften and Clear Stubborn Residue
Hard, brittle caulk often comes out easier with gentle heat. Run a hair dryer along the joint for a minute, then scrape again. For a thin silicone film, a silicone remover gel helps. Test any remover on a hidden spot first, especially on acrylic or fiberglass. Finish with a nonscratch pad until the surface feels smooth and squeaky.
Clean Off Mold and Dry the Joint Completely
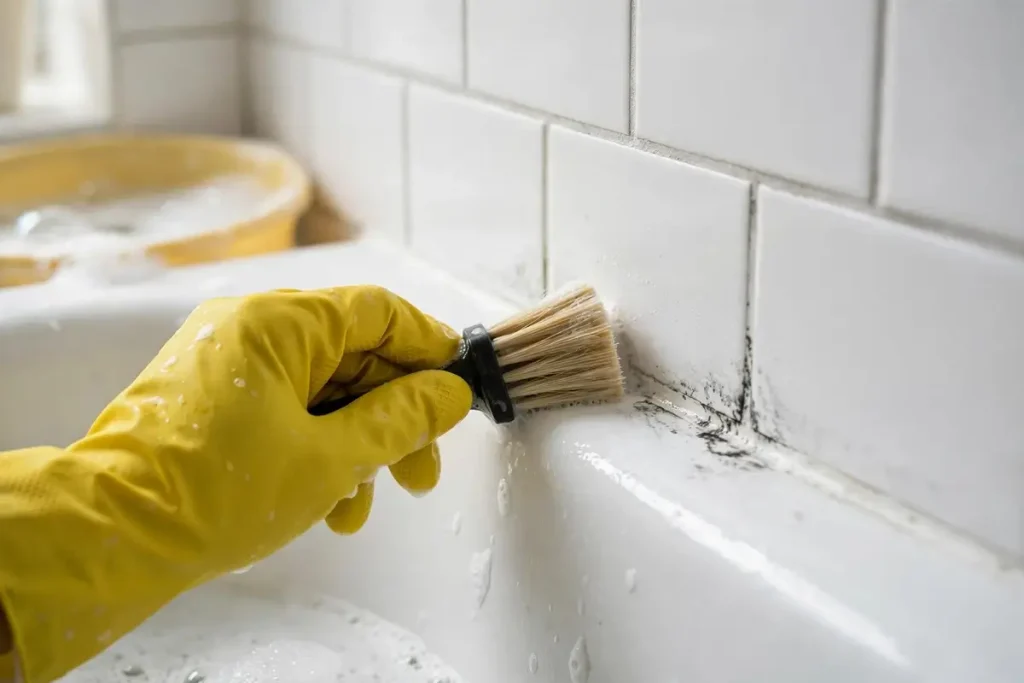
Scrub the joint with detergent and water, rinse it, and let it dry completely before you caulk. The U.S. Environmental Protection Agency advises against caulking moldy surfaces. Trapped moisture is the most common reason new caulk peels early.
Why Rubbing Alcohol Cleans but Does Not Treat Mold
Rubbing alcohol strips soap film and body oils so caulk can grip. Use it as the final wipe only. It does not treat mold. For mold on hard surfaces, the EPA recommends detergent, water, and a full dry. The agency does not recommend bleach as a routine mold cleaner.
If you still choose bleach, open a window and run the exhaust fan. Never mix bleach with ammonia or other cleaners, because the fumes are toxic. Rinse the joint well and let it dry.
How Long the Joint Needs to Dry
A clean joint with no leaks usually needs a few hours. Old caulk with gaps or mold often means water soaked in behind the tile. In that case, point a small fan at the joint for 24 hours. A shower pro quoted by This Old House recommends this, because no caulk bonds to a wet surface.
Not sure the joint is dry? Press a folded paper towel into it for a few seconds. Any damp mark means it needs more time.
How to Caulk a Bathtub Step by Step
Work in this order: fill, tape, cut the tip, run the bead, smooth it, and pull the tape. Keep every tool within reach before you start. Silicone skins over within minutes, so each step should follow the last without a long break.
Step 1: Fill the Tub With Water
Fill the tub close to the overflow before you caulk. The weight settles the tub slightly and opens the joint to its widest point. Caulk that cures in that position compresses when the tub empties. It stays put when someone later steps into a full bath.
Step 2: Tape Both Sides of the Joint
Run painter’s tape along the tile just above the joint. Run a second strip along the tub just below it. Leave a strip about 1/4 inch wide, centered on the gap. Press the tape edges down firmly, so caulk cannot creep underneath.
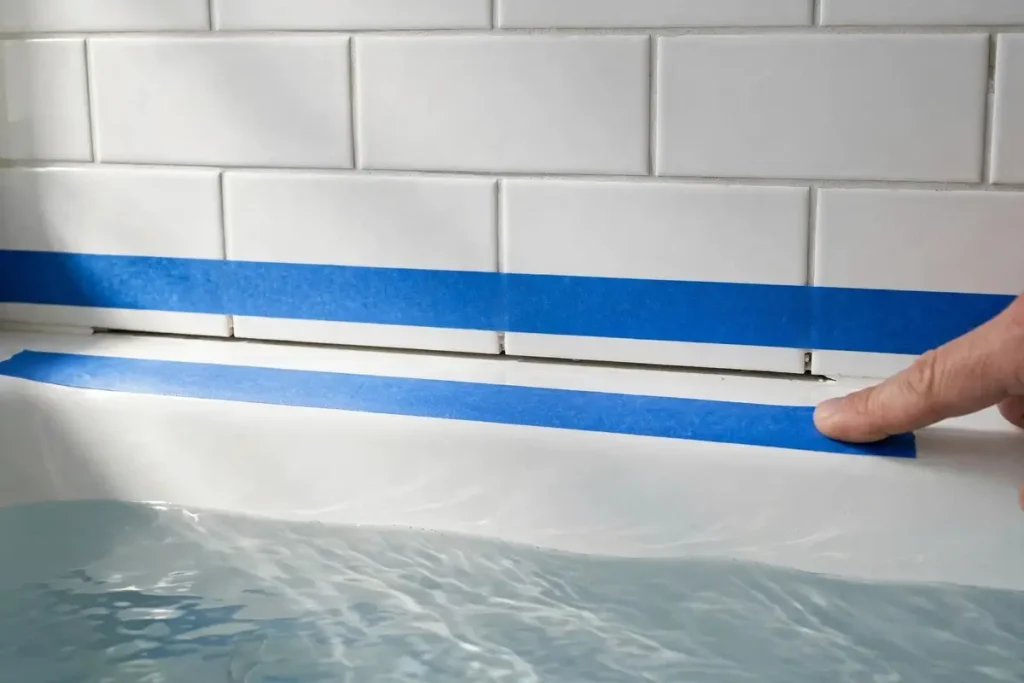
Taping is the easiest way to caulk around a bathtub with straight lines on a first try. Tape the vertical wall corners first, then the tub edge.
Step 3: Cut and Load the Caulk Tube
Cut the tip at a 45 degree angle, close to the end. Aim for an opening about 1/8 inch wide. You can always cut more later, but you cannot add plastic back. Puncture the inner seal with the wire on your caulk gun. Load the tube and squeeze onto cardboard until the caulk flows evenly.
Check the label for the minimum application temperature, too. In winter, warm the bathroom before you start and keep it warm while the caulk cures.
Step 4: Apply One Continuous Bead
Start at an inside corner and hold the gun at the same 45 degree angle. Squeeze steadily and move at an even pace. Push the bead slightly ahead of the tip, so caulk fills the gap instead of sitting on top. Stop at the next corner and release the trigger.
Step 5: Smooth the Bead
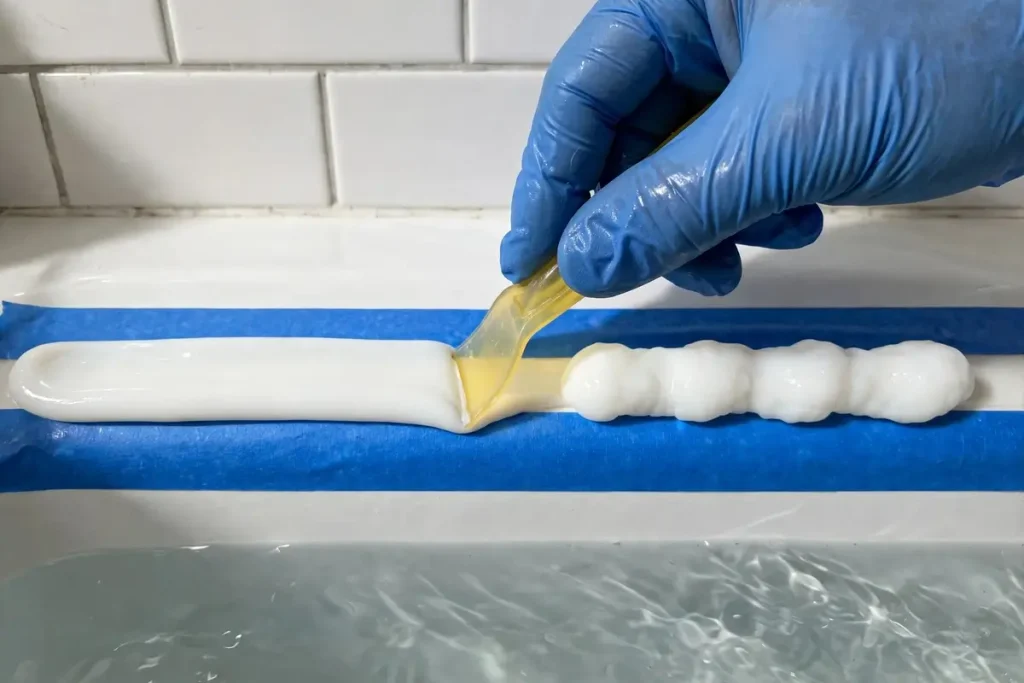
Smooth each section right after you apply it, in one steady pass. A caulk finishing tool gives the most even shape. A gloved finger also works well. Silicone sticks to bare skin, so skip the bare finger. A light mist of soapy water keeps the bead from grabbing your tool or glove.
Step 6: Pull the Tape While the Caulk Is Wet
Remove the tape within a few minutes of smoothing, before the silicone skins over. Pull it slowly at a sharp angle, away from the bead. Tape pulled after the caulk dries tears the edge and lifts the bead. If a small ridge forms, press it down lightly with a gloved finger.
Step 7: Let the Caulk Cure Before You Drain the Tub
Leave the water in the tub and keep everyone out until the caulk cures. Open a window or run the exhaust fan to help it cure and clear the smell. Drain the tub only after the full time on the label has passed. Plug the tip of any leftover tube with a nail so it keeps for touch-ups.
How Long Before You Can Use the Tub After Caulking
Plan on at least 24 hours before anyone showers or bathes. A cool or humid bathroom can stretch that to 72 hours. Many silicones feel dry within an hour, but they have not cured yet. Using the tub too early is one of the fastest ways to ruin a fresh bead.
Anyone learning how to caulk a bathtub should know that dry and cured mean different things. Dry caulk has only skinned over on top. Cured caulk has hardened all the way through and sealed the joint.
Cool rooms and thick beads slow curing. Acrylic based caulks can take longer in a humid bathroom. Keep pets out of the bathroom until the caulk cures. Some caulks contain ingredients that are harmful if swallowed, so call your vet if a pet chews fresh caulk.
Caulking Corners and Wide Gaps Around the Tub
Inside corners need a slower hand, and gaps wider than 1/4 inch need backer rod first. Recaulking a bathtub in an older home often turns up both problems, because walls and tubs settle over time.
Getting Clean Inside Corners
Stop each bead exactly at the corner. Then start the next wall from the corner and work outward. Overlapping beads build a lump that is hard to smooth. Smooth toward the corner so your tool leaves a clean, rounded fill.
Seal the vertical seams where two tiled walls meet, too. The Tile Council of North America calls for flexible sealant at every change of plane like these. Grout cracks there as the house moves.
When a Gap Needs Backer Rod First
Caulk alone can span a gap up to about 1/4 inch. A U.S. Department of Energy job aid calls for backer rod in any wider gap. Backer rod is a foam cord that fills deep gaps, so caulk only seals the surface.
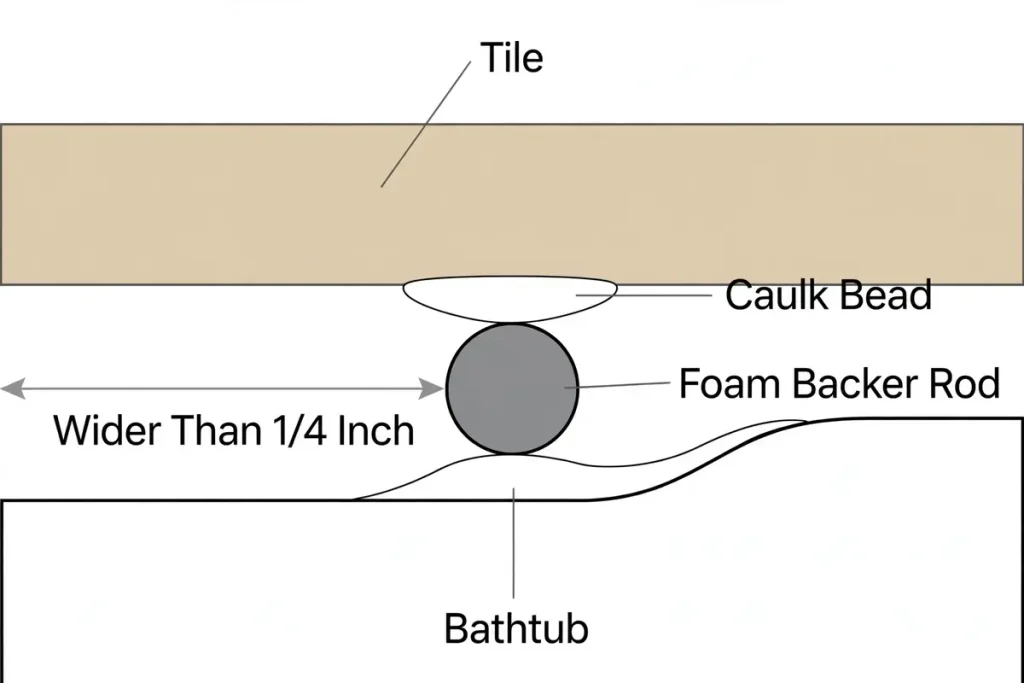
Pick a rod slightly wider than the gap. Press it in evenly with a putty knife, just below the surface. Then caulk over it as usual. Knowing how to caulk around a bathtub with a wide gap prevents a bead that sags and splits.
Common Mistakes to Avoid When You Caulk a Tub
Most failed caulk jobs trace back to prep. Avoid these slips, and your new bead has a real chance of lasting for years.
- Caulking over old caulk means both layers peel off together.
- Caulking a damp joint traps moisture that breaks the bond from behind.
- Cutting the tip too wide lays down a fat bead that is messy to smooth.
- Acrylic latex on a tub shrinks and cracks under constant water and movement.
- Skipping the water in the tub lets the bead tear during the first full bath.
- Stopping mid-wall and restarting leaves a seam that fails first.
- Pulling tape after the caulk dries rips the edge and lifts the bead.
- Showering too soon softens uncured caulk and leaves weak spots.
How to Fix a Bad Caulk Job
Most caulk mistakes are fixable, but silicone does not patch well. In most cases, cut out the bad section and redo it. New silicone bonds poorly to cured silicone, so a smear on top will peel.
A Lumpy or Uneven Bead
If the caulk is still wet, reshape it with one smooth pass of your tool. If it has already skinned over, let it cure fully. Then slice out the lumpy section and caulk that stretch again.
Caulk That Will Not Stick
Caulk that lifts or refuses to grab usually means the surface was dirty or damp. Soap film and old silicone residue cause most of these failures. Remove the loose section completely. Clean it with alcohol, let it dry, and caulk it again.
Mold Showing Through New Caulk
Dark spots under new caulk within weeks usually mean mold was left behind. They can also mean water is still reaching the wall. Remove the caulk, scrub with detergent and water, and dry the joint fully. The EPA notes that running a fan or opening a window helps keep bathroom mold from coming back. Wipe the bead dry after showers to keep it clean longer. If mold returns a second time, have the wall checked for a leak.
Should You Recaulk a Bathtub Yourself or Hire a Pro
Most homeowners can handle this job with basic tools and some patience. Hire a pro when the problem goes beyond the caulk joint. Angi puts professional tub or shower caulking at $65 to $300, and DIY supplies usually run under $50.
HomeGuide gives a similar range of $50 to $200. Most pros charge by the hour, so thick old caulk raises the bill. Ask whether a quote includes removing the old caulk, since that is most of the labor. Learning how to re-caulk a bathtub yourself pays off, since the job comes around every few years.
Call a pro instead if you notice any of these problems:
- The tub moves, creaks, or flexes noticeably when you step in.
- Tiles near the tub are loose, cracked, or sound hollow when tapped.
- The wall behind the joint feels soft or crumbles.
- Water stains keep showing up on the ceiling below.
These signs point to water damage or a structural issue. Fresh caulk cannot fix either one.
Frequently Asked Questions
Should You Fill a Bathtub With Water Before Caulking?
Yes, a full tub helps the new caulk last longer. The caulk cures while the joint sits at its widest, so it compresses instead of tearing later.
Is Silicone or Latex Caulk Better for a Bathtub?
Silicone is the better choice for the joint around a bathtub. It stays flexible and waterproof in constant moisture. Latex and acrylic caulks clean up and paint more easily, but they break down faster near water. The same trade-off shows up in the full latex vs silicone caulk comparison for other parts of the bathroom.
Can You Caulk Over Old Caulk?
No, new caulk belongs on bare, clean surfaces only. Fresh caulk bonds poorly to old caulk, so both layers peel together. Old caulk can also trap mold under the new bead.
Should You Caulk Where the Tub Meets the Floor?
Yes, when you caulk a bathtub, include the joint where it meets a tile floor. Grout cracks there because the tub and floor move separately. A flexible bead keeps mop water and splashes away from the subfloor.
Why Does Caulk Smell Like Vinegar?
Many bathroom silicones release acetic acid as they cure. Acetic acid gives vinegar its sharp smell. The odor fades once the caulk fully cures, so keep the room ventilated until then.
Why Did My New Caulk Fail Within a Few Months?
Early failure after caulking a bathtub usually means something went wrong before the first bead. Leftover old caulk, a damp joint, or water on an uncured bead are the usual causes. The fix is to remove it and start over with clean, dry surfaces.
Is It Hard to Learn How to Caulk a Bathtub?
No, most first timers get good results on their first try. The hardest part is removing the old caulk completely. Painter’s tape and a finishing tool handle most of the skill for you.
Final Thoughts
A lasting seal depends more on prep than on a steady hand. Strip every trace of old caulk, clean the joint, and let it dry. Then follow the steps in order and give the silicone a full day to cure. Now that you know how to caulk a bathtub, your seal can last for years instead of months.

About HomeFixStyle
HomeFixStyle is a home improvement blog dedicated to helping readers create better, more comfortable, and stylish homes. We share practical ideas, helpful guides, home decor inspiration, renovation tips, and simple solutions for everyday home projects. Our goal is to make home improvement easier to understand and apply, whether you are updating one room or improving your entire home.